You can add custom fields to your cards. Here's how to create and manage them.
How to create a Card Field
The initial set up of the custom Doc Code / Card Field must be done by an Admin User. Once created, they can be enabled or disabled on any project.


- Field Type: This is how you will enter the information into the custom column
- Text - Simple text field for entry by users.
- Checkbox - Yes/No field
- List - Only specific values can be selected. The list can be a pre-existing user list, or a list you create (custom list). For more information, see this article: Create Lists for Custom Fields.
- Automatically insert into Project configuration template: Will automatically import the field on all project configuration templates. To enable the field, see the instructions below.
- Field on Project Forms: Display (and allow editing) of this field in the assign (or actions) scroll in screens.

How to enable the Card Field on your project
Once the Custom Fields have been created, you must enable them on the project from the Project Configuration page (if not automatically added at the time of creation). To do this, navigate to Project Menu > Set Up > Project Configuration. Open the "Fields & Equipment Types" tab and expand the "Doc Code / Card Fields" section.
This will list all Custom Columns that have been created at the admin level. Now you can Enable or Disable accordingly to meet your project requirements.

Once you have made the changes, you can leave as is and columns will be applied to your project accordingly. You also have the option to “Save as New Template” or Overwrite Currently Selected Template. By saving the template, (new or overwrite) it will allow you to select for future projects so that you do not have to modify manually each time.
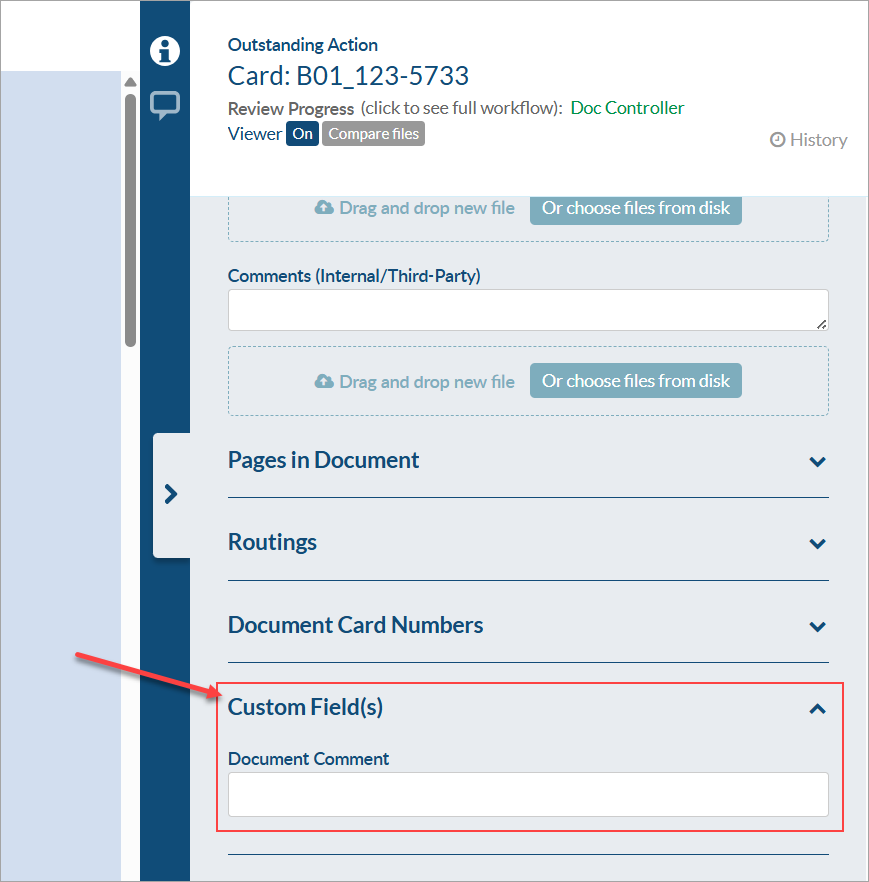
Where you will see your custom column.
In the screen above it shows the "Document Comments" enabled. So lets see where you would find this field on your project.

Card List

Assign(Edit) roll in screen

Outstanding Actions

NOTE:
If you can not find the column on a specific grid, be sure that it is enabled to view.
1. Mouse over any column Header and click the down arrow
2. Scroll across the word "columns" until the selections become visible.
3. Anything that is checked off will appear in your grid. (Clicking on  will bring that column to the far left of the grid)
